


Adjusting a sewing pattern between two sizes (grading)
Grading Made Easy: Customizing Patterns to Your Size
 |
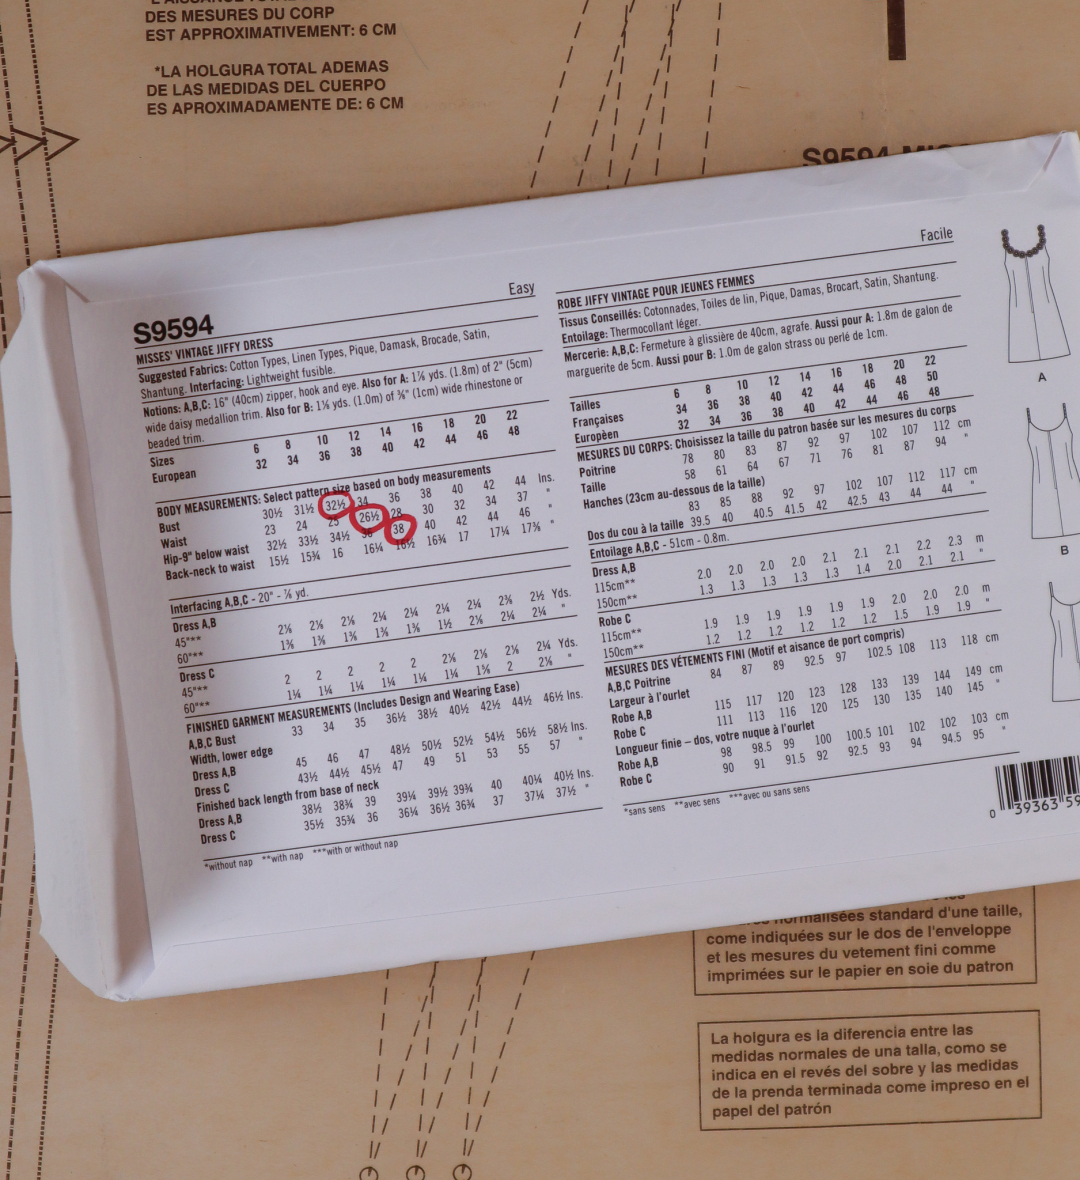
Not every body perfectly matches a single clothing size. Perhaps your bust measurement is a size 38, but your hips are a size 42. In this case, you don't have to choose just one size. By adjusting the pattern between different sizes ("grading"), you can tailor the pattern to your individual measurements. The result is a better fit and less alteration work on the finished garment. |
Step 1: Determine the Size DifferenceCompare your body measurements with the pattern's size chart. Pay particular attention to:
Note down the sizes that correspond to your individual measurements. For example, your bust might be a size 38 and your hips a size 42. |
 |
 |
Step 2: Find Key Body LinesLook for markings on the pattern for the:
These are often indicated by a small circle with a cross. |
Step 3: Mark Desired SizesMark the appropriate size on each body line. Example:
Draw the corresponding points on the pattern. |
|
 |
Step 4: Draw the New Pattern LineConnect the marked points with a smooth line. Helpful tools:
Ensure that the transitions are soft and harmonious. Especially in the waist and hip area, curved lines often emerge. Tip: Compare Front and Back PiecesSo that the side seams match up perfectly later:
This ensures both pattern pieces will match perfectly later. |
Step 5: Adjust Other Pattern PiecesDon't forget to check and adjust any corresponding pattern pieces as needed:
These must match the altered pattern pieces. |
Step 6: Test the FitBefore cutting your actual fabric, it's recommended to make a toile from calico or inexpensive cotton. Check the:
Make any final adjustments as needed before cutting your original fabric. |
NoteSimple patterns are usually easier to grade between sizes than models with many pattern pieces or complex details. If you are new to grading, it is best to start with a simple pattern. |
